
What is Okta?
Okta is a security tool that provides sign-on and authentication services for LHC Group applications and services like VPN, Outlook Web Access, and Citrix. It will help to manage logins, simplify the sign-on process, and make our systems more secure. This will be the only way to access many of these applications and services going forward. You will need to register yourself in Okta to ensure you can access and login to the IT services you use.
Start Here
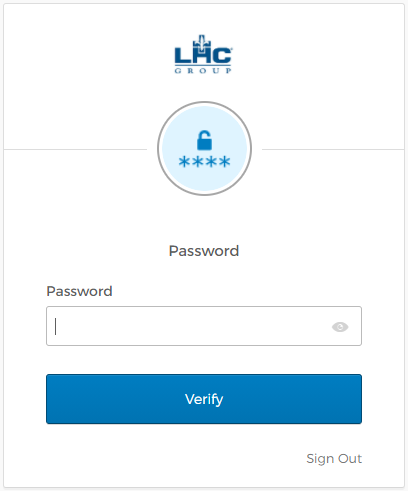
Login at https://sso.lhcgroup.com. For the Username, enter the same username you use to access your computer or VPN and press “Next”.

On the password screen, enter the password that you use for your computer or VPN and press “Next”.
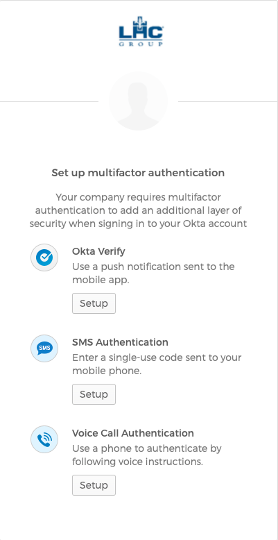
The first time that you login successfully, you will see the options to “Set up multifactor authentication”. Now you will be able to setup Okta Verify, Voice Call Authentication, or SMS Authentication.
Authentication Options and Consent Disclosure
You can choose to activate one or more authentication options.
- Okta Verify – You will sign on by responding to a push notification sent to the Okta Verify mobile app on your device.
- SMS Authentication –Some users may see the option to authenticate via SMS (text message), depending on their role.
- Voice Call Authentication – You will authenticate by receiving an automated phone call and following the voice instructions provided.
IMPORTANT CONSENT & DISCLOSURE NOTICE
If you choose SMS Authentication and/or Voice Call Authentication, you are providing your explicit consent to receive automated text messages and/or automated voice calls from LHC Group for authentication and account security purposes. Message and data rates may apply. Message frequency varies and is limited to login and account verification events. Consent is not a condition of employment.
You may disable SMS and/or Voice Call Authentication at any time by updating the verification settings for your account at https://sso.lhcgroup.com. In addition, you may opt out of SMS messages by replying STOP to any authentication text message. If you opt out of SMS messages, SMS Authentication will be disabled and you will need to use another authentication method.
If you are unable or prefer not to use the Okta Verify app, you may proceed using Voice Call Authentication or SMS Authentication if available to you.
Get Okta Verify
The quickest way to confirm your identity is with the Okta Verify app. Using the Okta Verify app on your device, you will be prompted to enter either a security code or accept a notification when you are attempting to access LHC Group critical applications. This is a security measure known as multi-factor authentication (MFA).
LHC Group Managed Devices
If you already have Okta Verify installed proceed to Launch Okta Verify. If not, your LHC Group Managed phone or tablet should have Okta Verify installed on your device by IT. Alternatively, proceed to the instructions for Personal Devices to install it manually.
Personal Devices
If you do not have an LHC Managed device, you must download Okta Verify to your personal device. Choose a link below (Apple or Android) to download and install the Okta Verify app to your device.
Apple App Store – Okta Verify or search “Okta Verify” in the App Store
Google Play Store – Okta Verify or search “Okta Verify” in the Play Store
Launch Okta Verify
Once you have Okta Verify, launch the application, and click on “Add Account”

On the next screen, click on the “Continue” button to Allow Camera Access & Push Notifications
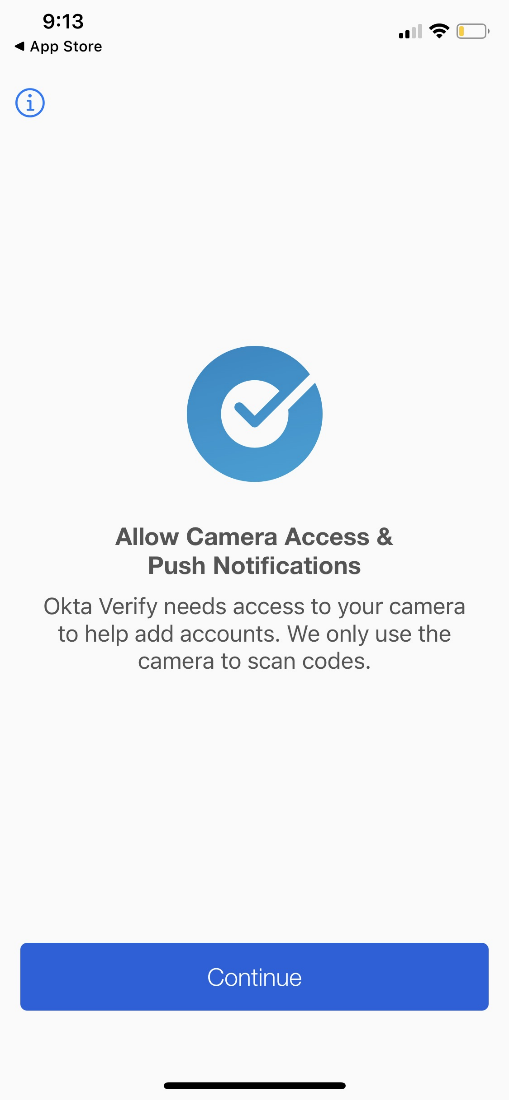
After clicking Continue, you should see the following message “Okta Verify” Would Like to Send You Notifications. Click “Allow”.
Next you should see the message “Okta Verify” Would Like to Access the Camera. Click “OK”.
No Device
Alternatively, you can still use Okta MFA without the Okta Verify app. In this case, you will need to provide a phone number where you can be reached when you are attempting to access critical LHC Group applications. When activating your account, enroll in the Voice Call factor. That will enable Okta to call you with a code that you enter during the login process.
Setup Okta Verify via
QR Code
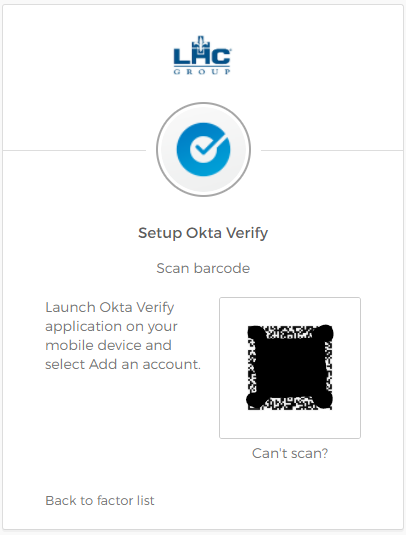
IMPORTANT: This process requires you to use your device to scan a QR Code with Okta Verify. You would usually do this with a mobile device and a laptop. If you only have the mobile device, please choose to setup via Email or via Secret Key below.
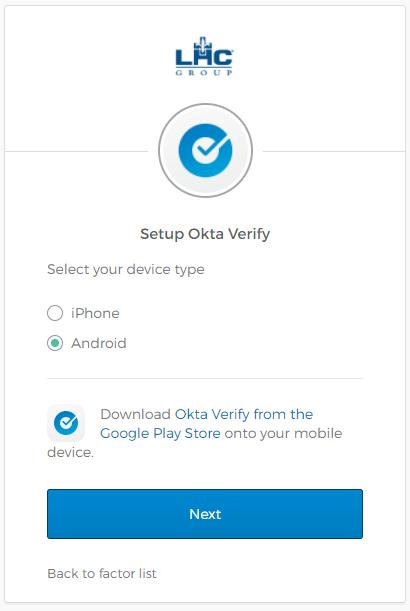
Under “Okta Verify” click “Setup”. Choose your device (“iPhone” or “Android”). If you don’t already have the Okta Verify App you can follow the link to your app store to install it. When you’re ready, click “Next”.

Open the Okta Verify app on your device, click the (+) button at the bottom right, and scan the QR code displayed on the screen.

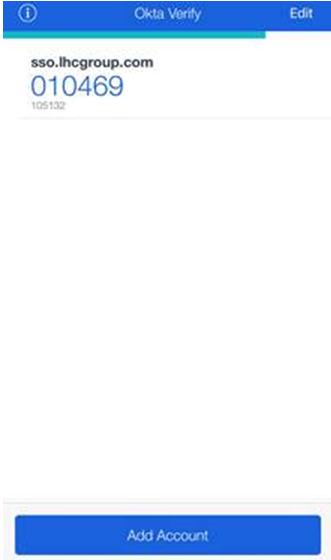
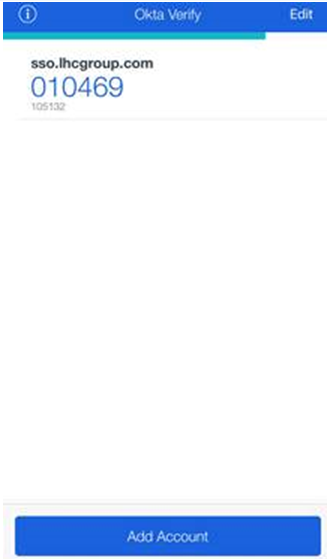
In the App, you will see a set of numbers rotating. Your account is enrolled when you see this and you can move on to the next steps.
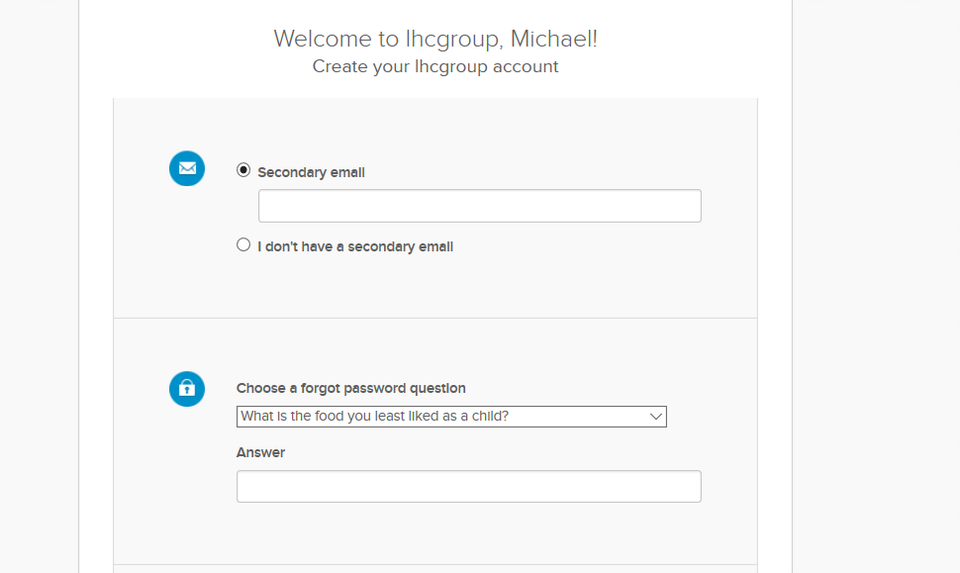
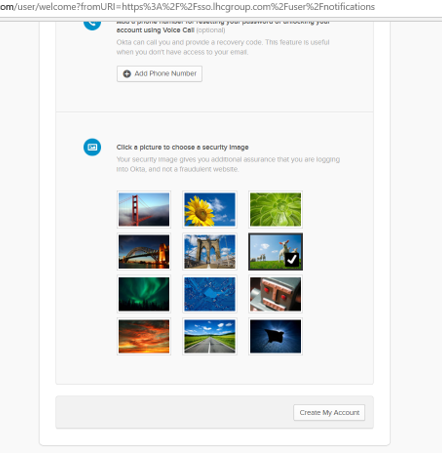
If Okta Verify is the first factor you setup, there is an additional screen. Answer the remaining questions (includes choose a forgot password question, and selecting a picture/security image), then click on the “Create My Account” button.

If Okta Verify is the first factor you setup, there is an additional screen. Answer the remaining questions (includes choose a forgot password question, and selecting a picture/security image), then click on the “Create My Account” button.
Setup Okta Verify via
Under “Okta Verify” click “Setup”. Choose your device (“iPhone” or “Android”). If you don’t already have the Okta Verify App you can follow the link to your app store to install it. When you’re ready, click “Next”.
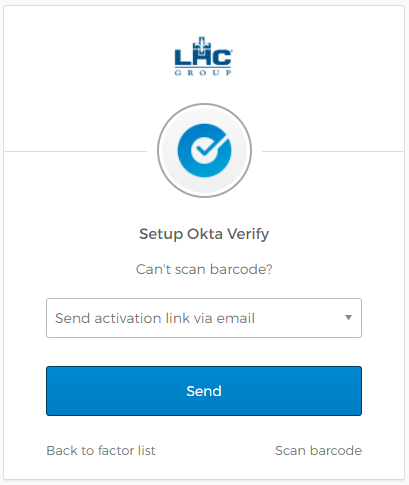
Since you are going to activate via email, click “Can’t Scan” below the QR Code.

After clicking “Can’t scan?”, you will see the alternative registration methods. Select “Send activation link via email” and click “Send”.
In the App, you will see a set of numbers rotating. Your account is enrolled when you see this and you can move on to the next steps.
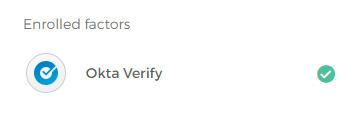
After clicking “Send”, you will receive an email with a link to “Activate Okta Verify Push” that is good for 10 minutes. Open that link on your device that has Okta Verify installed. Once complete, you will see that Okta Verify now has a green check indicating you have successfully enrolled.
If Okta Verify is the first factor you setup, there is an additional screen. Answer the remaining questions (includes choose a forgot password question, and selecting a picture/security image), then click on the “Create My Account” button.

Setup Okta Verify via
Secret Key
Under “Okta Verify” click “Setup”. Choose your device (“iPhone” or “Android”). If you don’t already have the Okta Verify App you can follow the link to your app store to install it. When you’re ready, click “Next”.

Since you are going to activate via Secret Key, click “Can’t Scan” below the QR Code.
After clicking “Can’t scan?”, you will see the alternative registration methods. Select “Setup manually without push notification” and a Secret Key will be displayed.
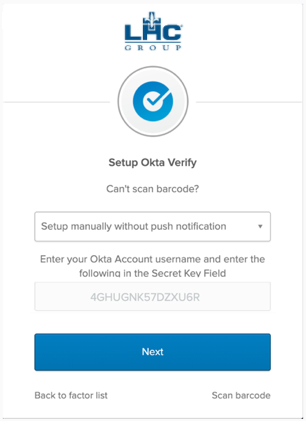
Open the Okta Verify app on your mobile device and click the (+) at the bottom right to display the QR code scanner. Below the scanner, click the “No Barcode?” link. You will see the screen below. Enter your login and the Secret Key from the registration screen. Press “Add Account”.
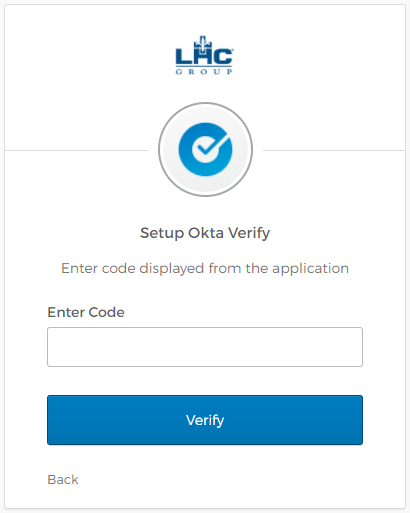
Your account is now on the Okta Verify app. Look for the 6-digit code by your login in Okta Verify, enter it on this screen, and click “Verify”.
You are now enrolled with Okta Verify! In the App, you will see a set of numbers rotating. Your account is enrolled when you see this and you can move on to the next steps

If Okta Verify is the first factor you setup, there is an additional screen once you login. Answer the remaining questions (includes choose a forgot password question, and selecting a picture/security image), then click on the “Create My Account” button.

Setup Voice Call Authentication
Under “Voice Call Authentication”, click “Setup”. Enter a phone number that you will have access to whenever you are logging in and click the “Call” button. Note: It is very important that this is a phone that is unique to you and will always be in your possession when you need to login via Voice Call. When you receive a call, enter the digits provided by the automated voice. You are now successfully enrolled for Voice Call Authentication.

If Voice Call is the first factor that you setup, there is an additional screen. Answer the remaining questions (includes choose a forgot password question, and selecting a picture/security image), then click on the “Create My Account” button.
Next Steps
Soon the dashboard that you see after logging in will be populated with apps that you can access with Okta. You can access them in this way or continue to access them the way you always have. Another article will explain the login process once those apps are ready for you.
Setup SMS Authentication
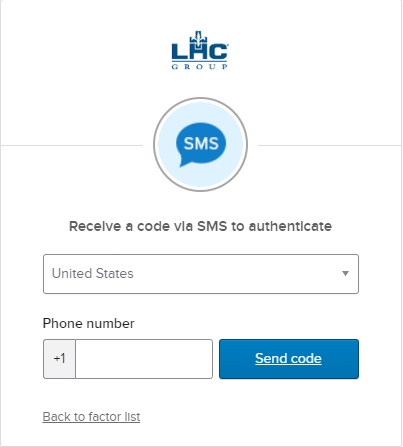
Under “SMS Authentication”, click “Setup”. Enter a phone number that you will have access to whenever you are logging in and click the “Send code” button. Note: It is very important that this is a phone that is unique to you and will always be in your possession when you need to login via SMS Authentication. When you receive a code via text message, enter the digits provided in the message. You are now successfully enrolled for SMS Authentication.
If SMS Authentication is the first factor that you setup, there is an additional screen. Answer the remaining questions (includes choose a forgot password question, and selecting a picture/security image), then click on the “Create My Account” button.
Next Steps
Soon the dashboard that you see after logging in will be populated with apps that you can access with Okta. You can access them in this way or continue to access them the way you always have. Another article will explain the login process once those apps are ready for you.